


Building ChatGPT Apps with Widgets
Introduction
ChatGPT Apps enable developers to build rich, interactive user interfaces that go beyond simple text responses. Using the OpenAI Apps SDK, you can create widgets that display dynamic content, handle user interactions, maintain state, and call tools—all within the ChatGPT interface. Widgets transform static responses into interactive experiences:- Display data in tables, carousels, or custom layouts
- Allow users to filter, sort, or manipulate results
- Persist state across conversations
- Call MCP tools directly from the UI
The Official OpenAI Apps SDK Approach
The official OpenAI Apps SDK requires developers to manually set up and configure multiple aspects of widget development.Manual Setup Requirements
When building widgets with the official SDK, you need to:- Separate Project Structure: Organize your project into distinct
server/andweb/directories - Manual Bundling: Configure esbuild or webpack to bundle your React components
- Manual React Setup: Write mounting code to attach components to the DOM
- Custom State Hooks: Implement your own
useWidgetStatehook for state persistence - Manual CSP Configuration: Configure Content Security Policy for your widget domains
- Manual Asset Handling: Set up static asset serving and path management
- Manual Tool Registration: Explicitly register tools and wire up widget responses
Traditional Development Flow
Code Example: Official SDK Setup
Project Structure:The mcp-use Simplified Approach
mcp-use eliminates all the manual setup and provides a zero-config development experience for building ChatGPT widgets.Zero-Config Features
With mcp-use, you get:- Single Command Setup:
npx create-mcp-use-app my-app --template apps-sdk - Automatic Widget Discovery: Drop
.tsxfiles inresources/folder—they’re automatically registered - Built-in Bundling: Hot reload and production builds work out of the box
- Pre-built React Hooks: Use
useWidget()for props, state, tool calls, and display modes - Automatic CSP Configuration: Content Security Policy is configured automatically
- Automatic Tool Registration: Widgets become tools automatically based on metadata
- Automatic Asset Handling:
public/folder serves static assets automatically
Simplified Development Flow
Code Example: mcp-use Setup
Project Structure:Widget Interaction Flow
Understanding the complete lifecycle of a widget interaction helps you build more effective ChatGPT Apps.Complete Lifecycle
Key Interaction Patterns
1. Tool Invocation → Widget Rendering
When a user asks a question, ChatGPT:- Identifies the appropriate tool based on the query
- Calls the MCP server’s tool with parameters
- Receives a widget resource in the response
- Loads and renders the widget in the UI
2. Widget State Persistence
Widgets can maintain state across interactions:- State is saved to ChatGPT’s localStorage
- Survives page reloads and conversation history
- Accessible via
useWidget()hook - Updates trigger UI re-renders
3. Widget-to-Tool Communication
Widgets can call tools directly:- User interacts with widget controls
- Widget invokes
callTool()to execute MCP server tools - Server processes the request and returns results
- Widget updates based on the response
State Flow Diagram
Testing with the MCP Inspector
The MCP Inspector is your primary tool for developing and debugging widgets. It provides a complete testing environment that mirrors ChatGPT’s behavior.Inspector Features for Widget Development
- Live Widget Preview: See your widgets render in real-time as you develop
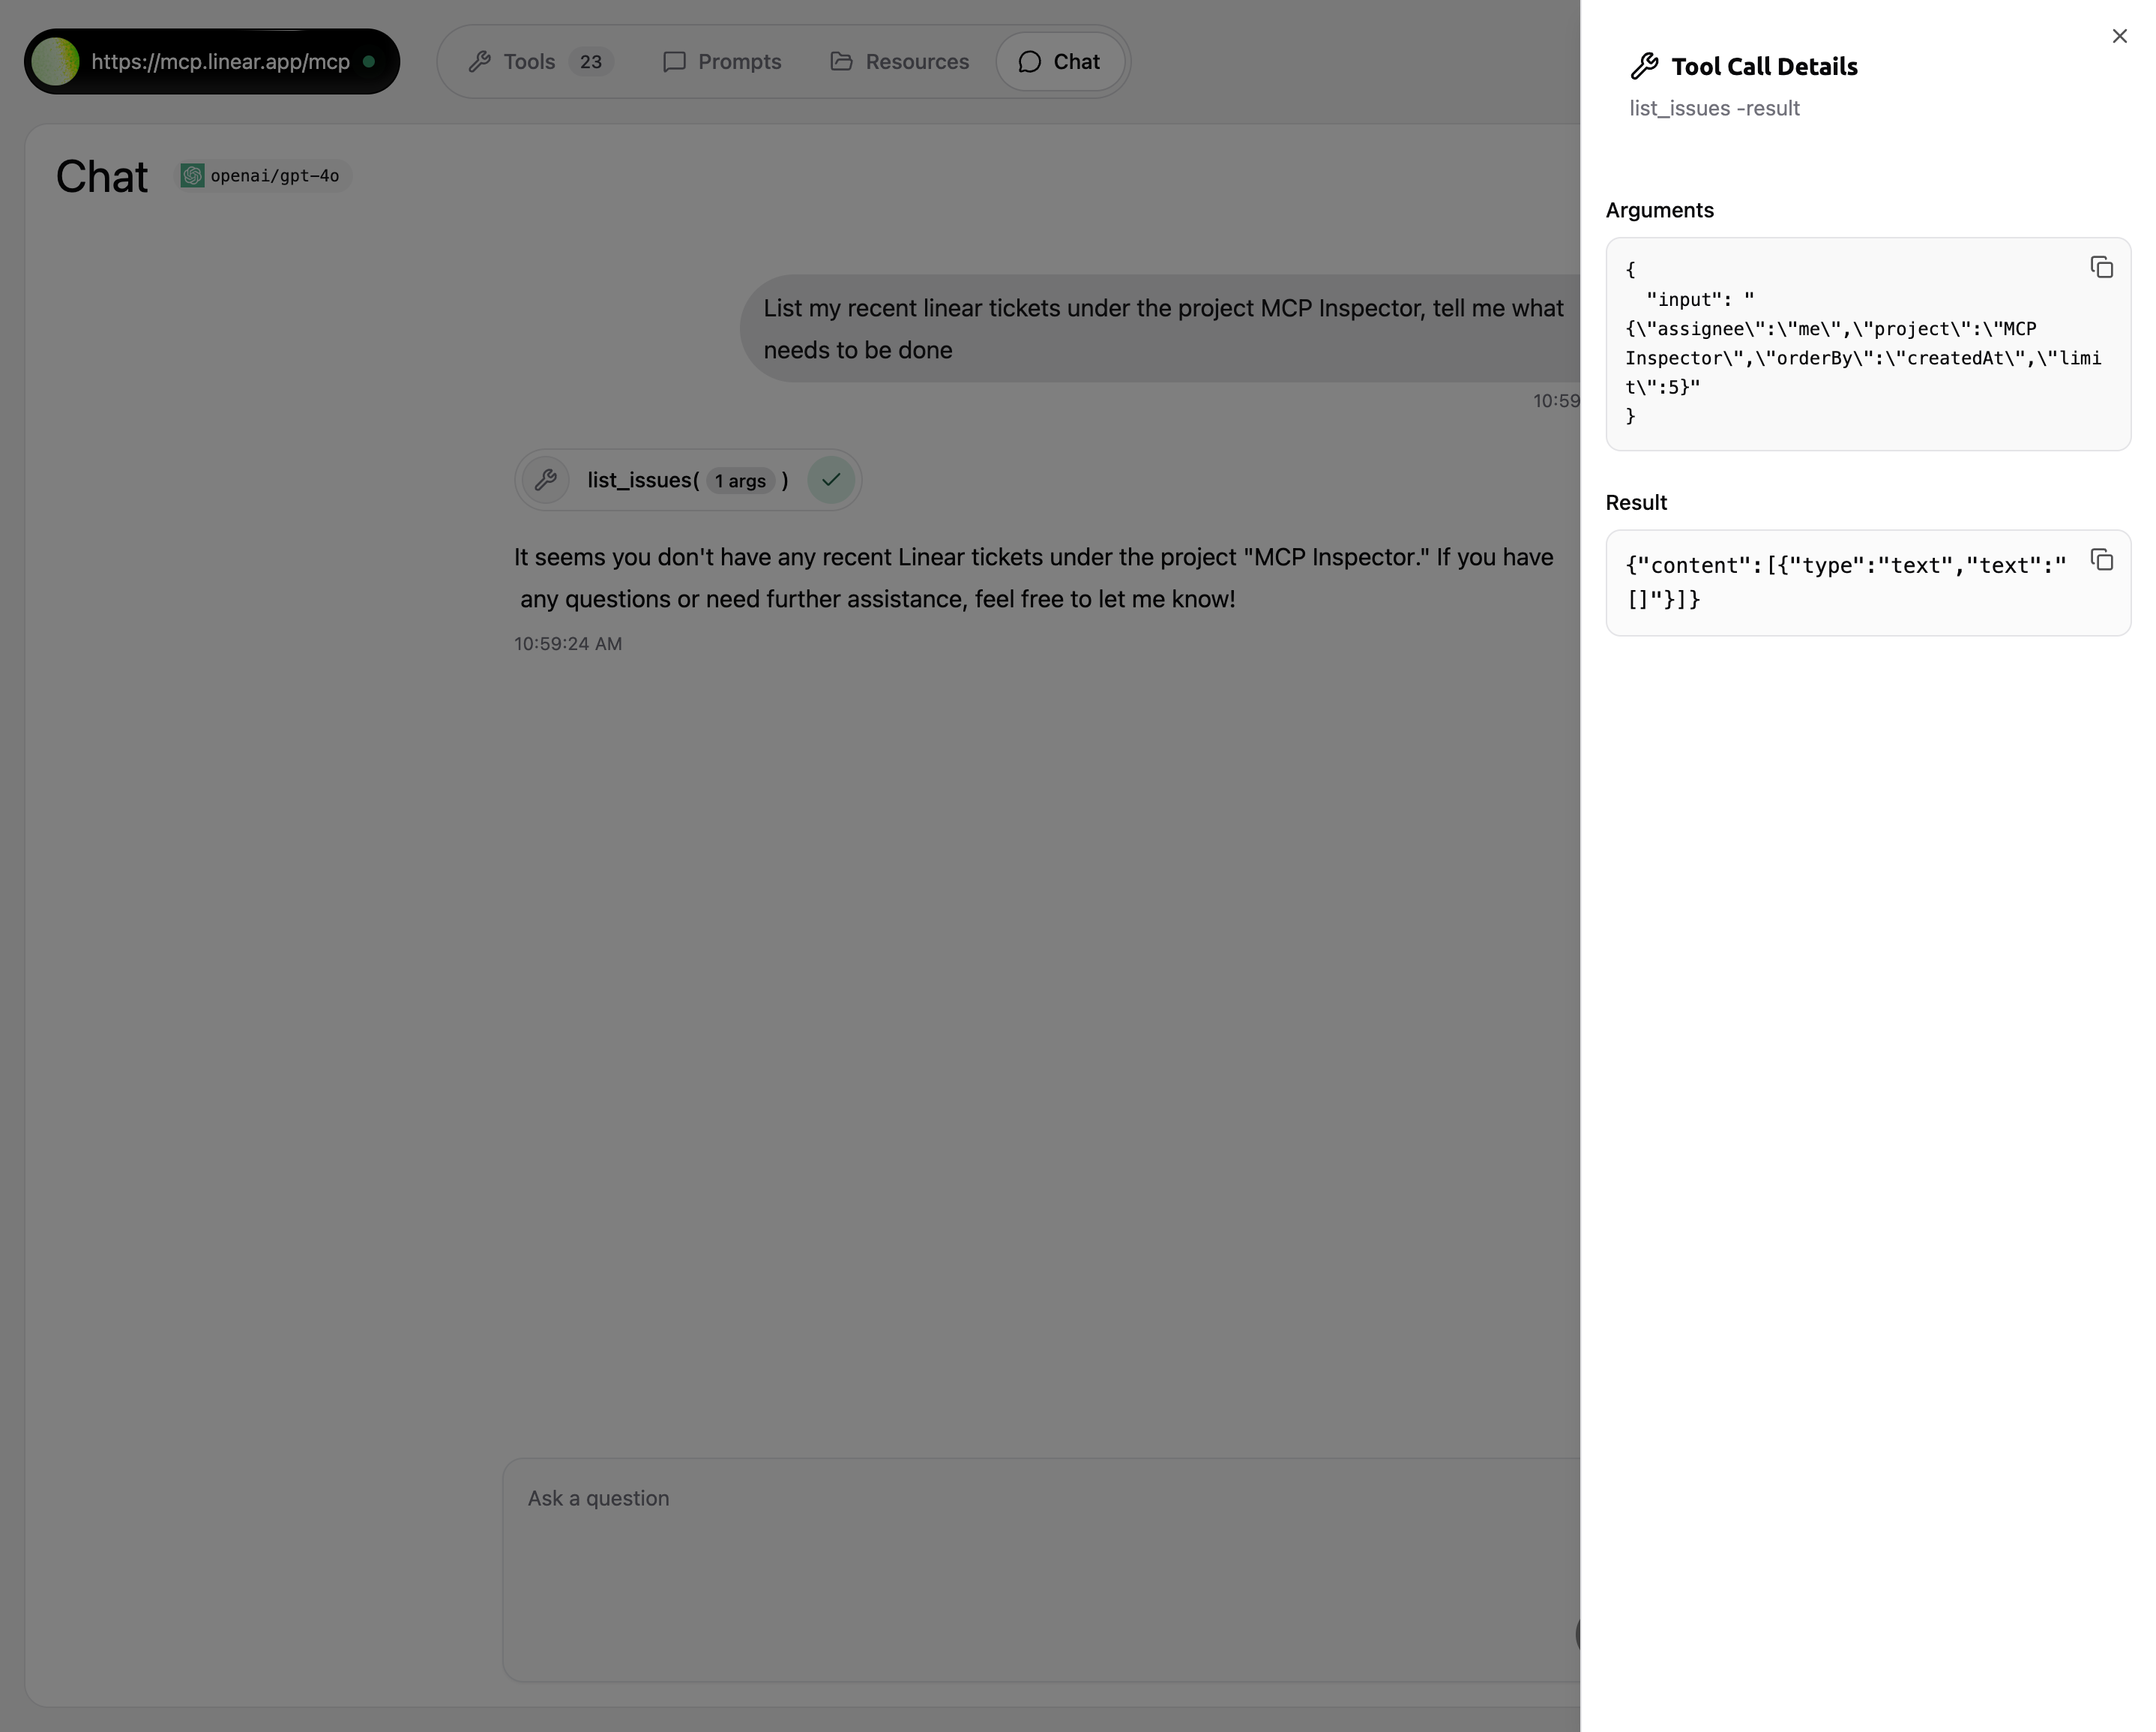
- Tool Execution: Test tool calls and view widget responses
- State Inspection: Monitor widget state changes
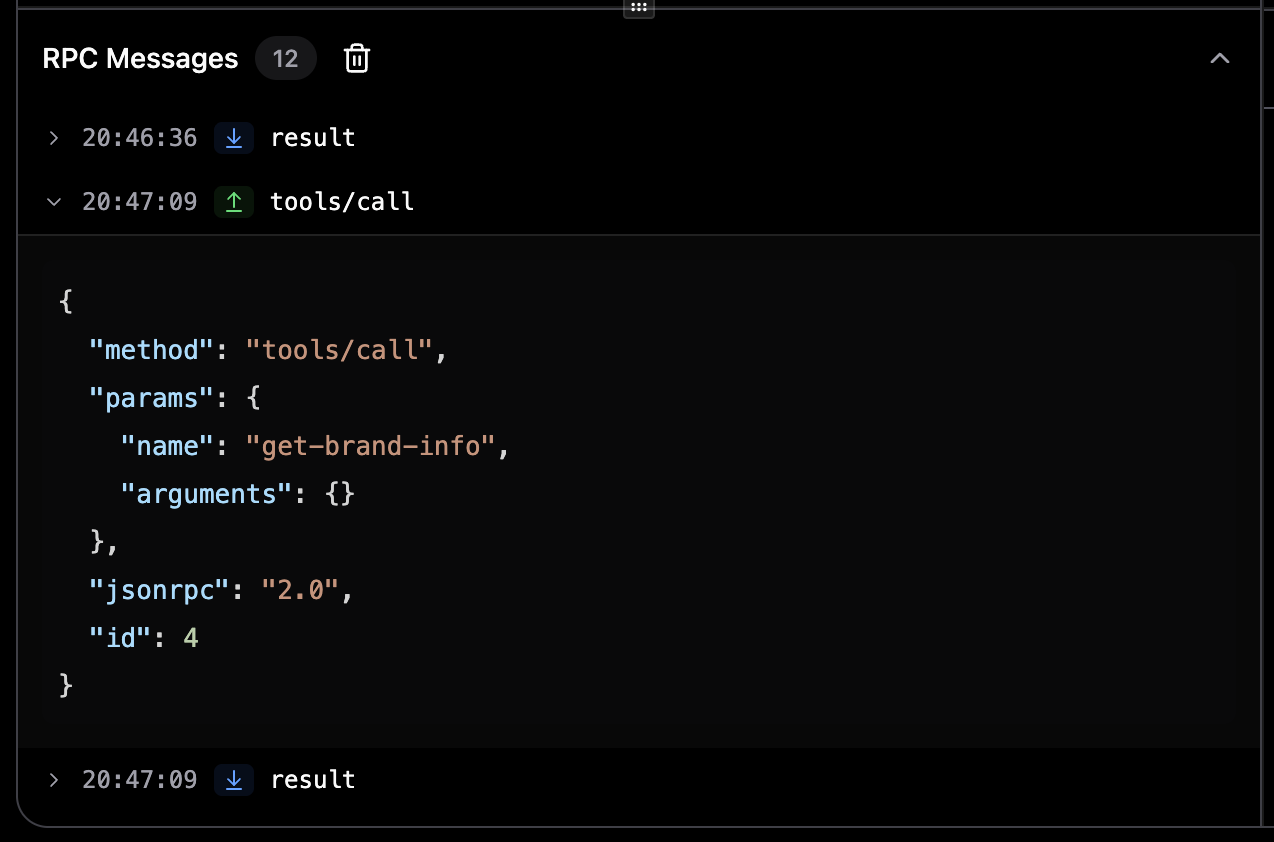
- RPC Logging: Debug MCP protocol messages
- Hot Reload: Changes reflect immediately without restart
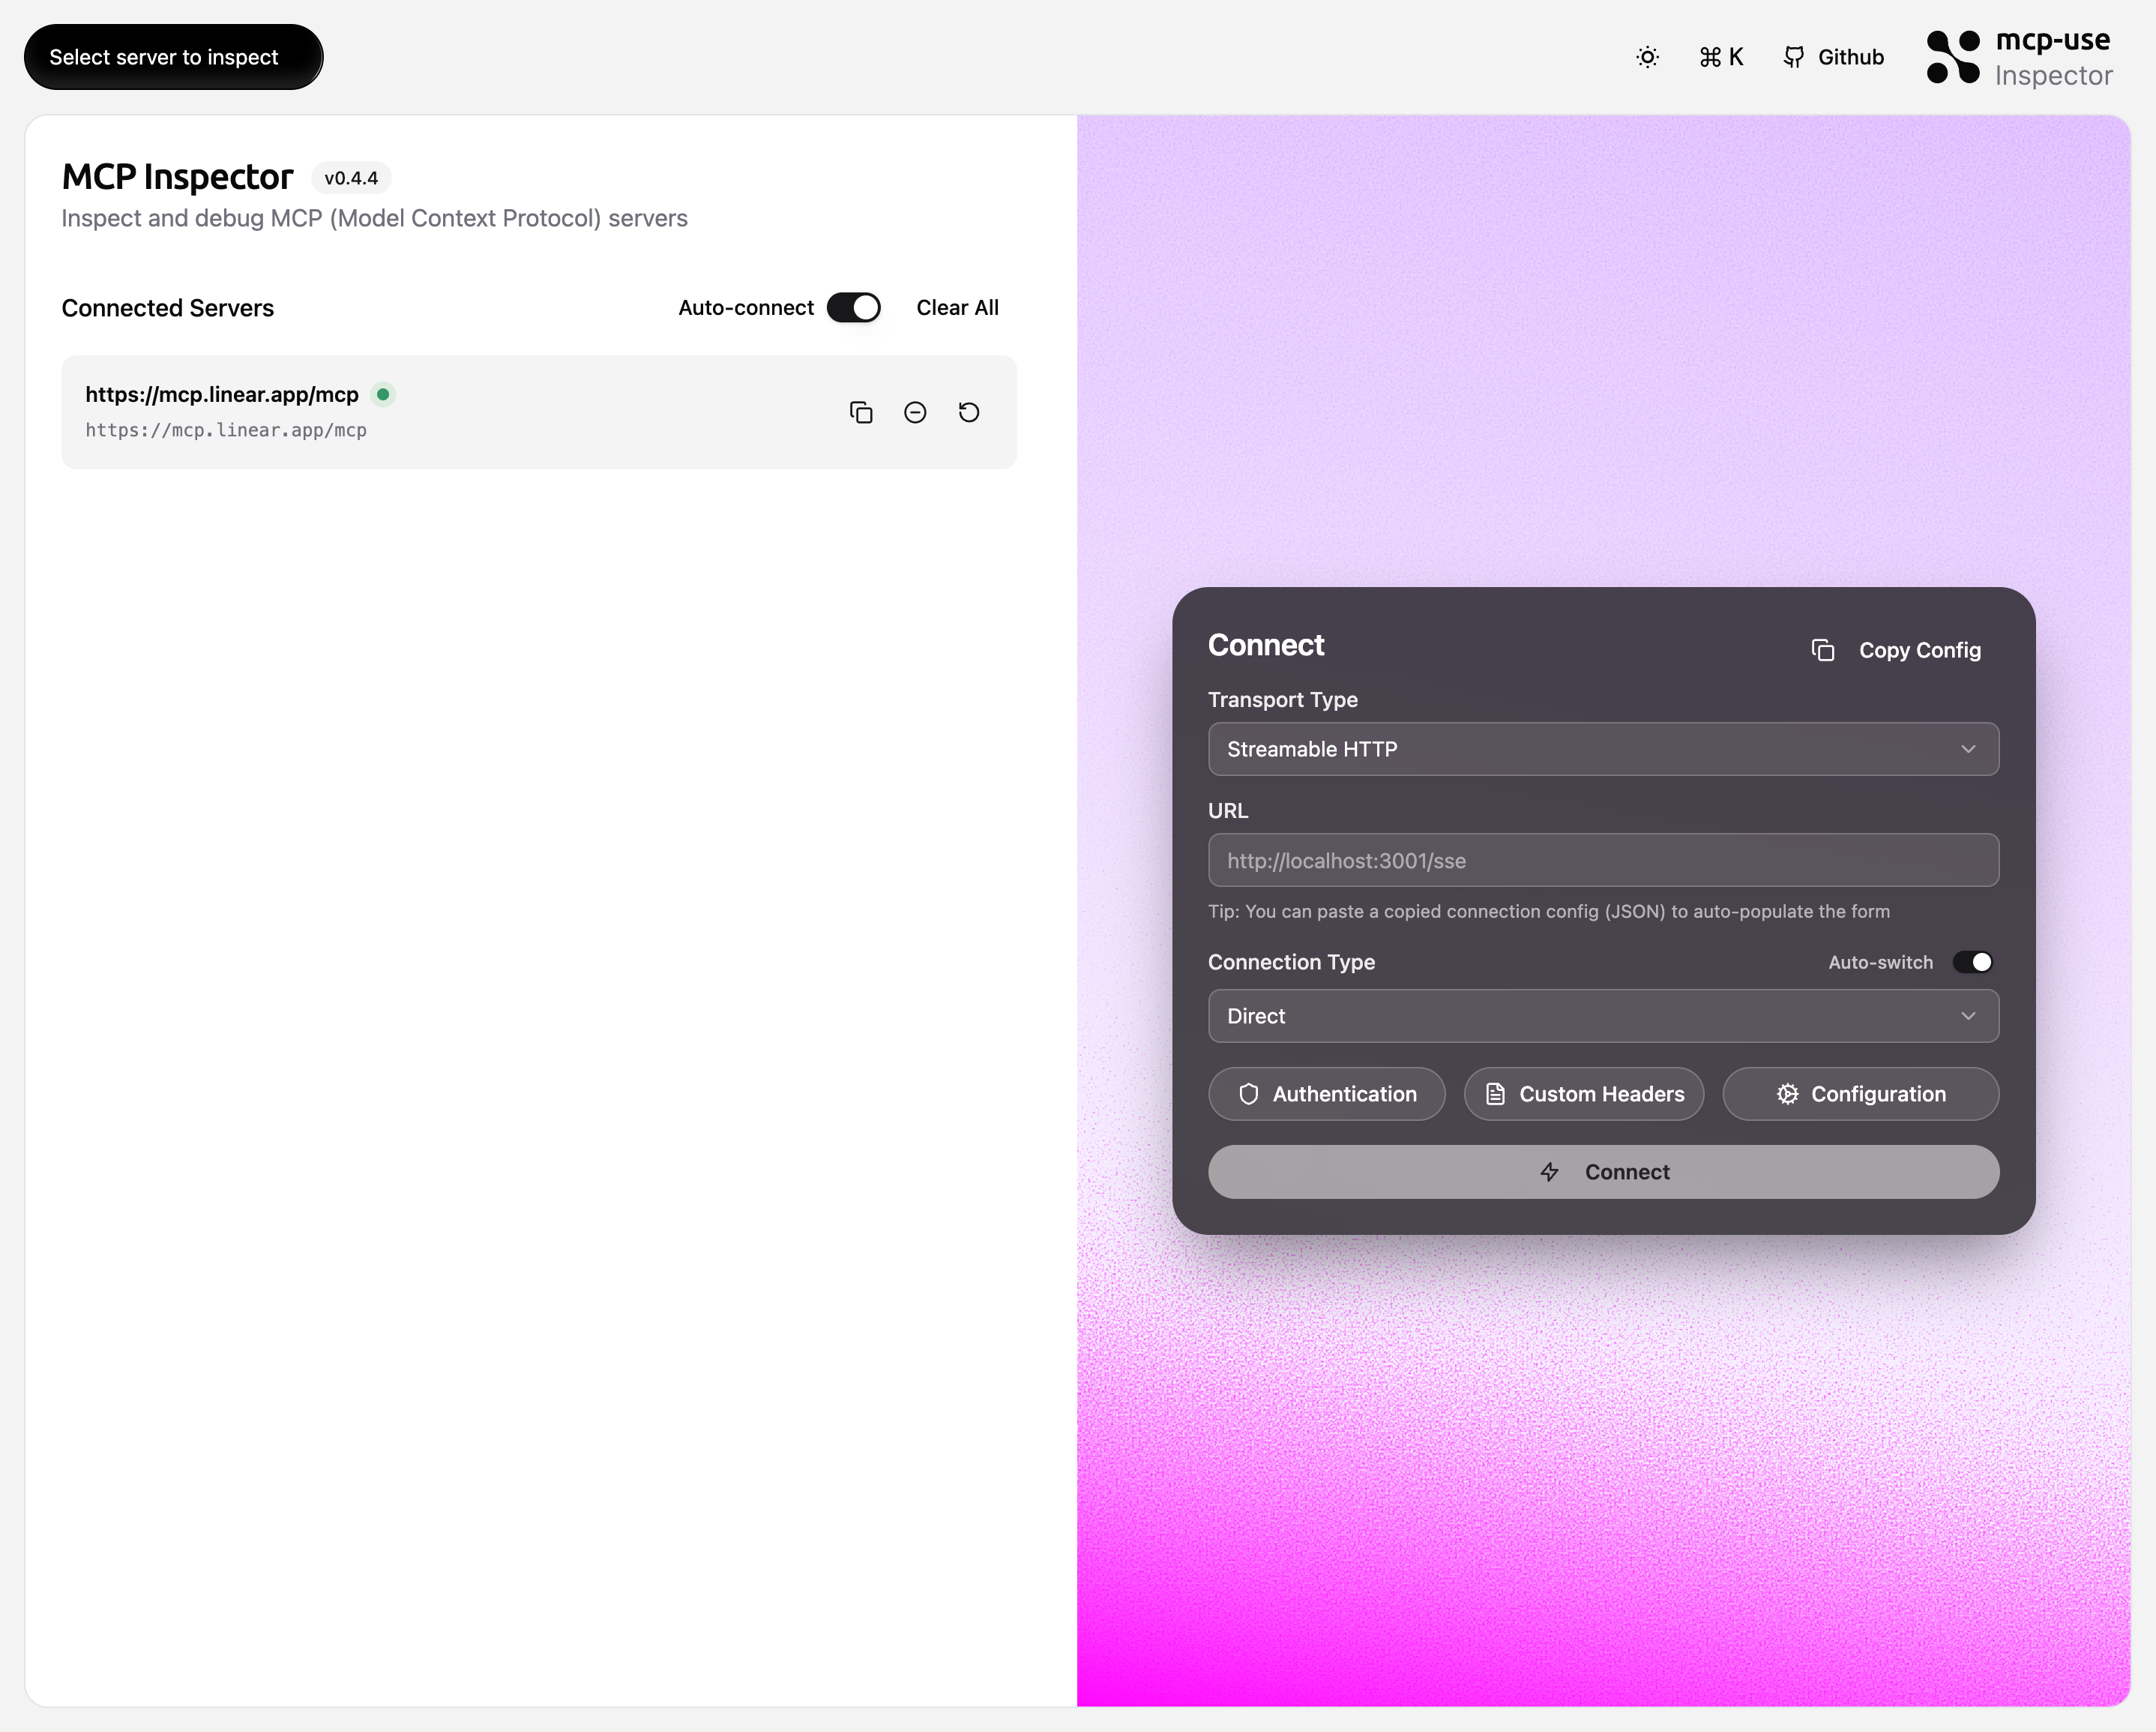
Using the Inspector
Start your server with Inspector: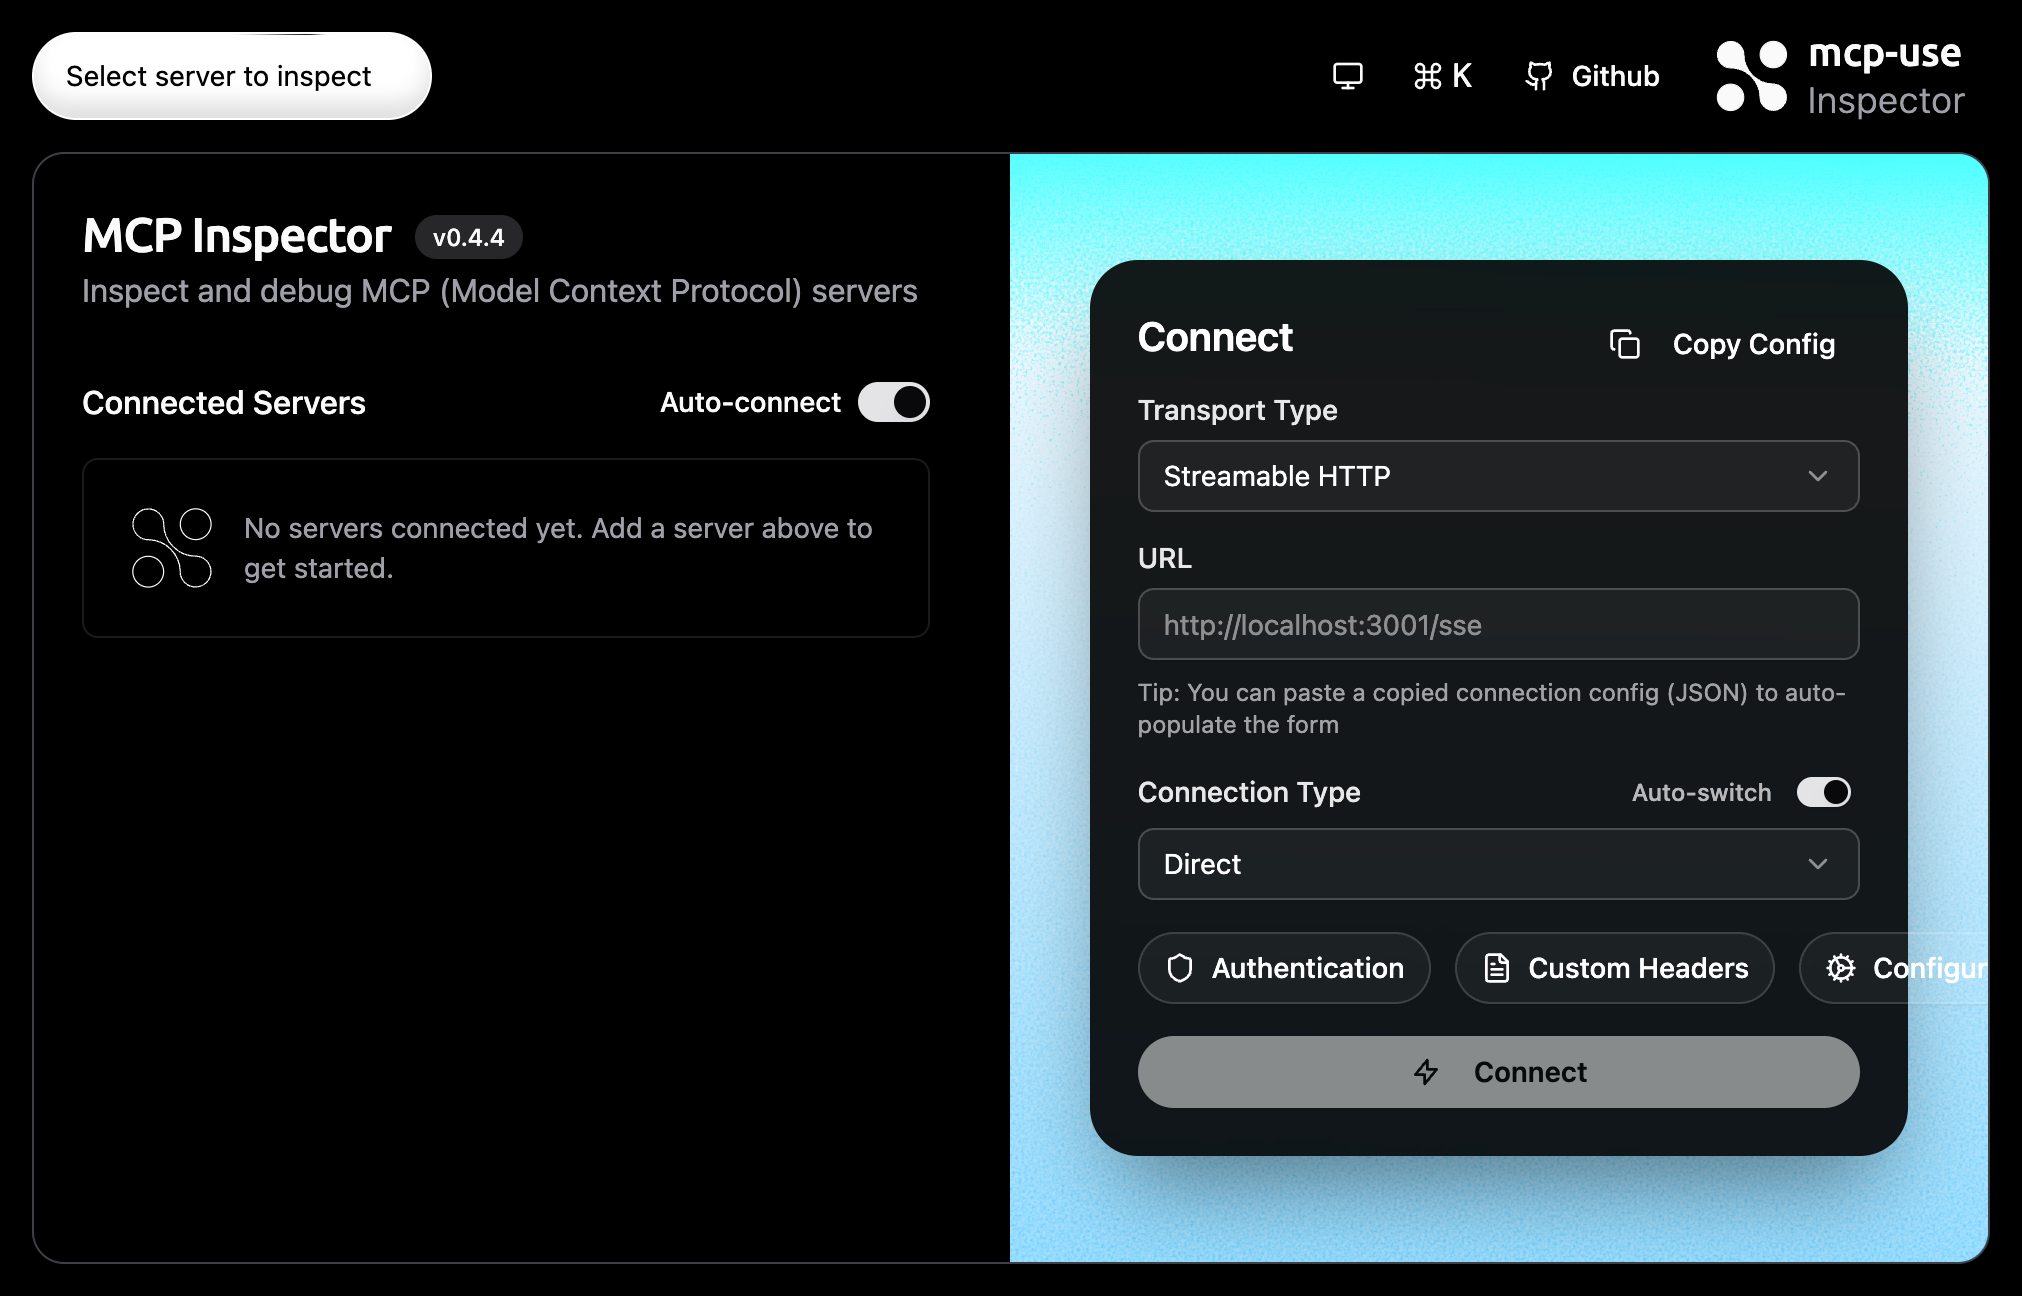
Testing Workflow
- Start development: Run
npm run devto start server with hot reload - Open Inspector: Navigate to
http://localhost:3000/inspector - Connect to server: Use the connection form to connect to your local server
- Test tool calls: Execute tools from the Inspector chat interface
- Verify widgets: Confirm widgets render correctly with proper styling
- Test interactions: Click buttons, update state, call tools from widgets
- Debug issues: Use RPC logs and console to identify problems
- Iterate: Make changes and see them reflected immediately
OpenAI SDK vs mcp-use: Feature Comparison
| Aspect | OpenAI Apps SDK | mcp-use |
|---|---|---|
| Setup | Manual project structure with separate server/ and web/ directories | Single command: npx create-mcp-use-app |
| Bundling | Manual esbuild/webpack configuration required | Automatic bundling with hot reload built-in |
| Widget Discovery | Manual registration of widget URLs | Auto-discovery from resources/ folder |
| State Management | Custom useWidgetState hook implementation | Built-in useWidget() hook with state included |
| Tool Registration | Manual tool-to-widget wiring | Automatic based on widget metadata |
| CSP Configuration | Manual Content Security Policy setup | Automatic CSP with trusted domains |
| Hot Reload | Manual setup with watch mode | Built-in development server with HMR |
| Asset Handling | Manual static file serving configuration | Automatic public/ folder serving |
| React Setup | Manual ReactDOM mounting code | Automatic mounting via McpUseProvider |
| TypeScript | Manual tsconfig and type definitions | Pre-configured with full type safety |
| Inspector Integration | No built-in debugging tools | Built-in Inspector for testing |
| Development Server | Need to set up separately | Integrated at http://localhost:3000 |
| Widget Props | Manual window.openai.toolOutput parsing | Type-safe props from useWidget() |
| Tool Calls from Widget | Manual window.openai.callTool() | Simple callTool() from useWidget() |
| Display Mode Control | Manual window.openai.requestDisplayMode() | Built-in requestDisplayMode() from hook |
| Error Handling | Manual error boundary implementation | Built-in ErrorBoundary component |
| Theme Support | Manual theme management | Built-in ThemeProvider with system theme |
Code Comparison: Common Tasks
Example 1: Widget Setup
- OpenAI Apps SDK
- mcp-use
esbuild src/weather.tsx --bundle --outfile=dist/weather.jsExample 2: State Management
- OpenAI Apps SDK
- mcp-use
Example 3: Tool Invocation from Widget
- OpenAI Apps SDK
- mcp-use
Example 4: Display Mode Control
- OpenAI Apps SDK
- mcp-use
Next Steps
Now that you understand how ChatGPT Apps work and how mcp-use simplifies widget development, explore these resources:UI Widgets Guide
Complete guide to building widgets with mcp-use, including advanced patterns and best practices
Creating Apps SDK Server
Step-by-step tutorial for setting up an MCP server with Apps SDK widgets
Inspector Debugging
Learn to debug and test your widgets using the MCP Inspector
Widget Components
Reference documentation for all widget components and hooks
Related Documentation
- MCP 101 - Understanding MCP fundamentals
- Response Helpers - Helper functions for tool responses
- Widget Components Reference - Complete API documentation
- Examples - Browse example projects and templates
Ready to Build?
Create your first ChatGPT App with widgets:http://localhost:3000/inspector and start building interactive ChatGPT experiences!